GitHub Actions is a tool that allows you to automate development workflows. Each task is called an action. A combination of tasks is called a workflow. Workflows can be triggered in different ways: push, pull requests (opened and/or merged), issues (created, closed, etc), on a specific schedule, or due to external events.
The workflows will be run in a virtual machine on the GitHub servers. A workflow can contain one or more jobs, and each job will run in its own virtual machine. These virtual machines can use Linux, Windows, or MacOS, and have different tools installed, and even run Docker Containers. Jobs can be run in parallel, or we can specify dependencies between them.
A runner is any virtual machine with the GitHub actions application installed. The runner is responsible for running the job whenever the triggering conditions are met, and for displaying back the results. You can use GitHub's runners, or host your own ones. GitHub hosted runners are maintained by GitHub, but we cannot customize the hardware configurations. They also come with some pre-installed tools like curl, git, npm, yarn, pip, etc, and languages and tools like Python, Ruby, node.JS, etc.
Workflows must be written in YAML and placed inside .github/workflows directory in the root of the project. This files are composed of key:value pairs, with keys separated from values by colons, :. To nest objects inside of other objects in YAML we just need to indent the keys of the child object with 2 or 4 spaces with respect to the keys of its parent object.
Each YAML file in the workflows directory contains the instructions for one workflow. The first key that we have to specify is name. The value we pass to it will become the name of the workflow and GitHub will display it in the Actions tab.
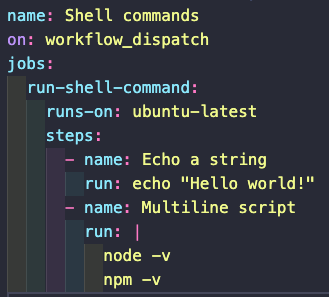
After the name we'll specify the dispatch mode of the action using the on key. The value of the on key can be a single value (for example, use push for a workflow that needs to be dispatched with every push), an array of values (for example, use [workflow_dispatch, push] for a workflow that needs to be dispatched with every push, but also needs to be able to be manually dispatched), or an object specifying more complex conditions or to alter the behavior of a pre-defined dispatch mode.
After the name and on keys, we need to start defining the jobs in our workflow. To do so we use the jobs key. To it we'll need to supply an array of objects (each element in the array representing a job) where the first key is the name of the job and takes as its value an object containing all the specifications of the job.
The first key of every job is runs-on. The value of this key needs to be the operating system in which the job is going to run. We can specify a version of the OS, or just use the key {os}-latest to have GitHub use the latest version of the OS.
Next comes the steps key, where we can specify the different steps of the job. We can specify a name for each step using the name key. After that we use the run key to specify what needs to be run on this step.
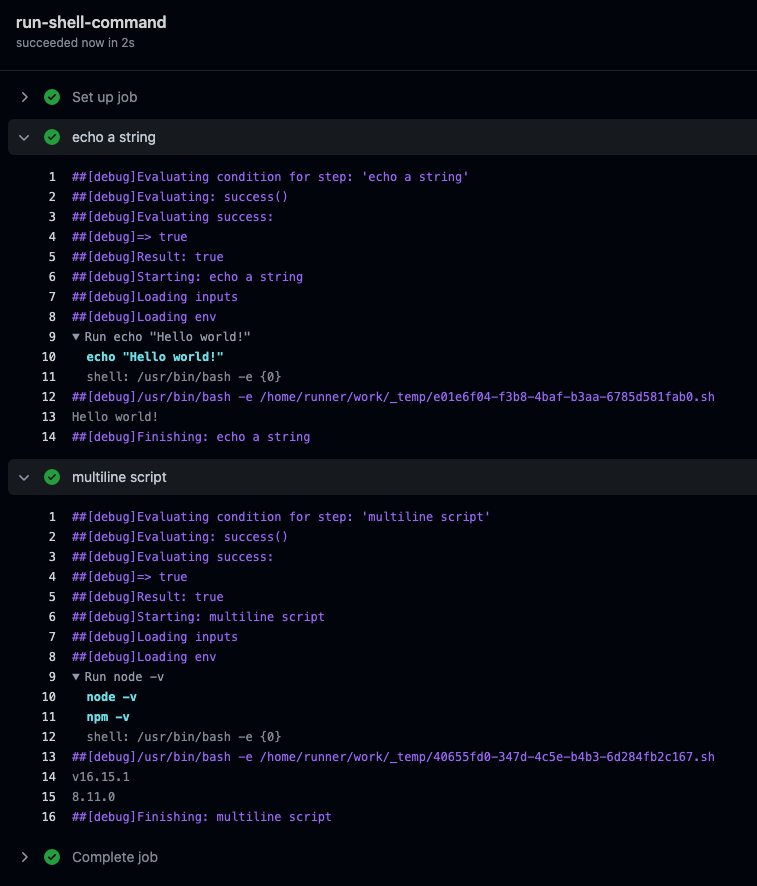
The first and last step are automatically created by GitHub. The first one sets up the job, and the last one cleans up after finishing. You can configure GitHub to send notifications after each workflow run by going to Profile > Settings > Notifications > Actions .
We can cancel a workflow while it's still running by pressing the Cancel check suite button on the top right corner of the Actions tab. We can also explore the steps, including their output, buy pressing the arrows left of the step name. We can use the search bar to explore the logs. If the job failed, we can trigger a re-run.
For each job we can define artifacts. In a nut shell, an artifact is a file generated by the job. An artifact that gets generated by default is the log archive. We can download this file from the Actions console. The log consists of one .txt file for each step of the job. It is useful for debugging.
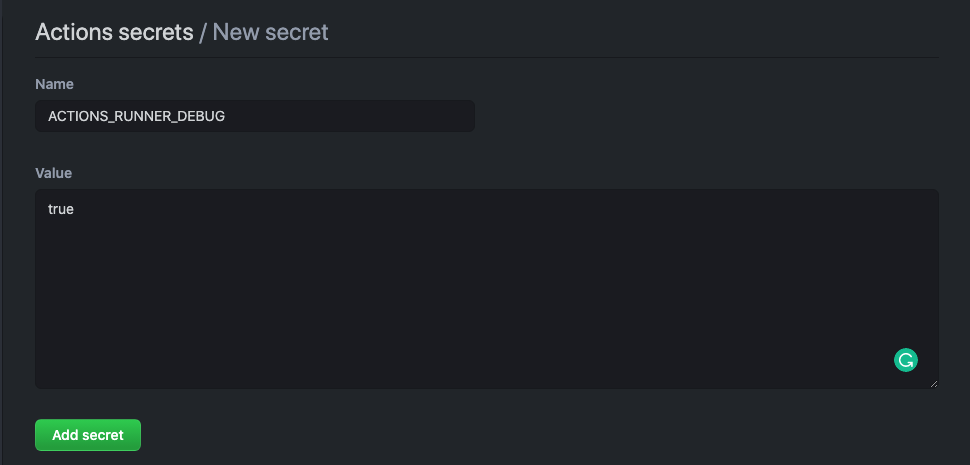
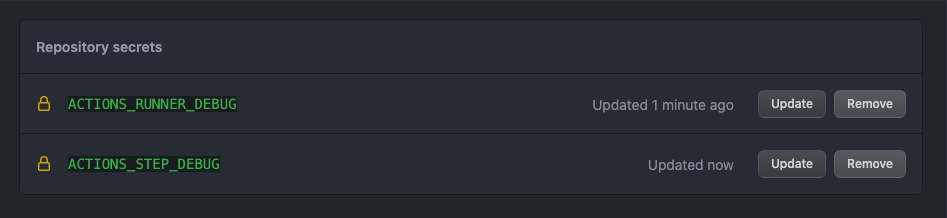
To see more information on the logs, we need to set the ACTIONS_RUNNER_DEBUG and ACTIONS_STEP_DEBUG secrets to true. To do so, we need to navigate to the Settings tab on the repo, and to the Secrets option on the left side menu, and click on the New repository secret button on the top right corner.