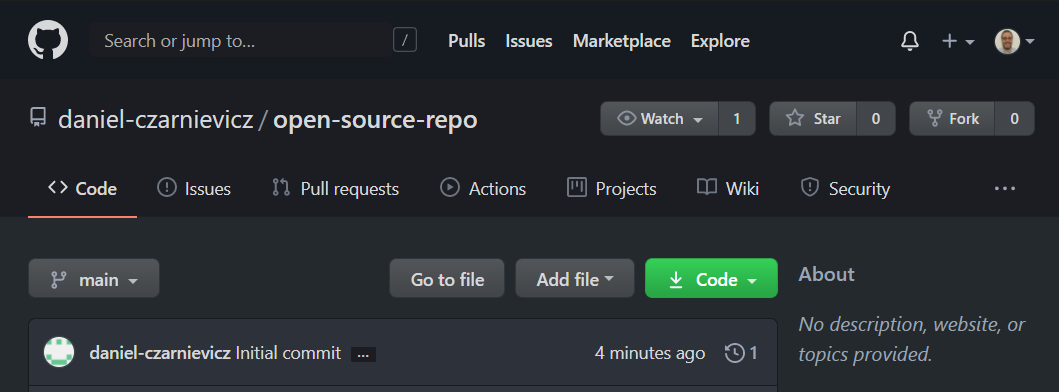
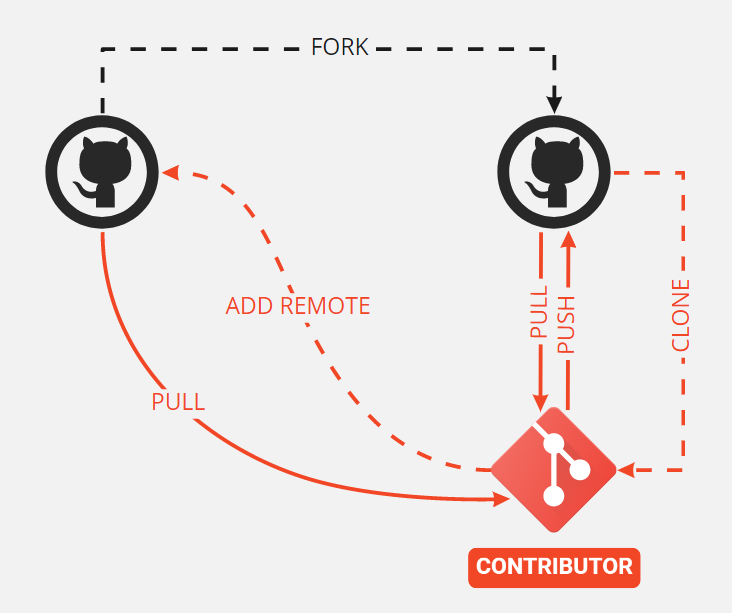
So far, all that we've done included working with a repository to which we have push access. Suppose now that we've found an Open-Source project to which we want to collaborate. These kinds of projects use the Integration-Manager Workflow that we saw before. Therefore, we don't have push access to them. This is why, when contributing to open source projects, the first thing we need to do is to fork the project repository. This will create a new repository that we own and that has a copy of all the code and files in the original repository.
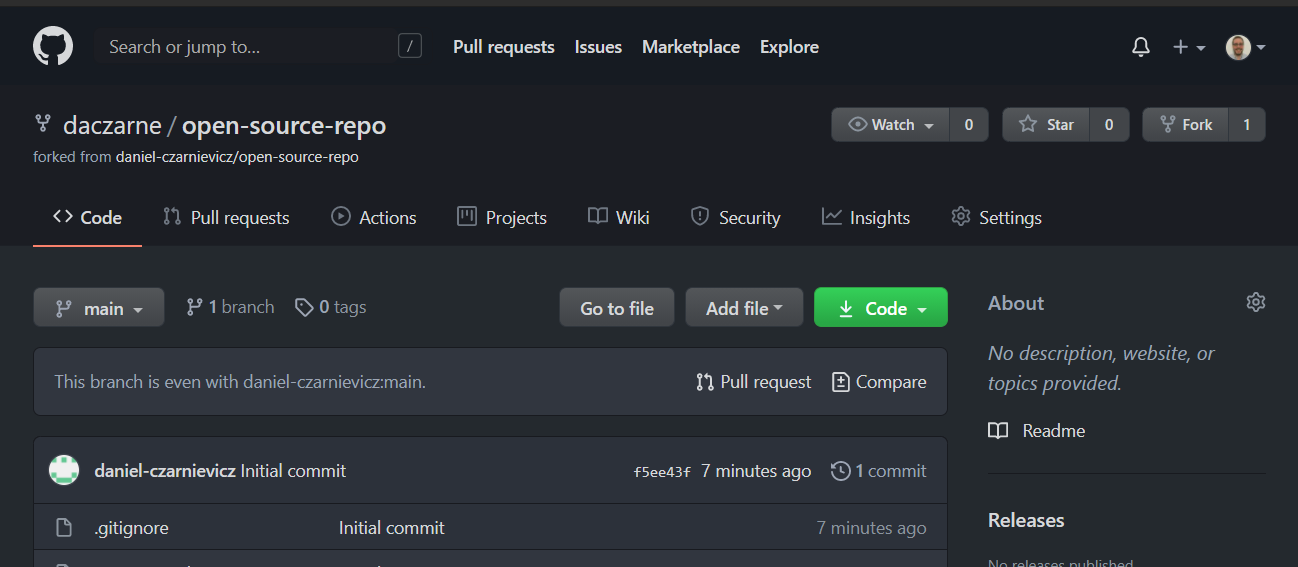
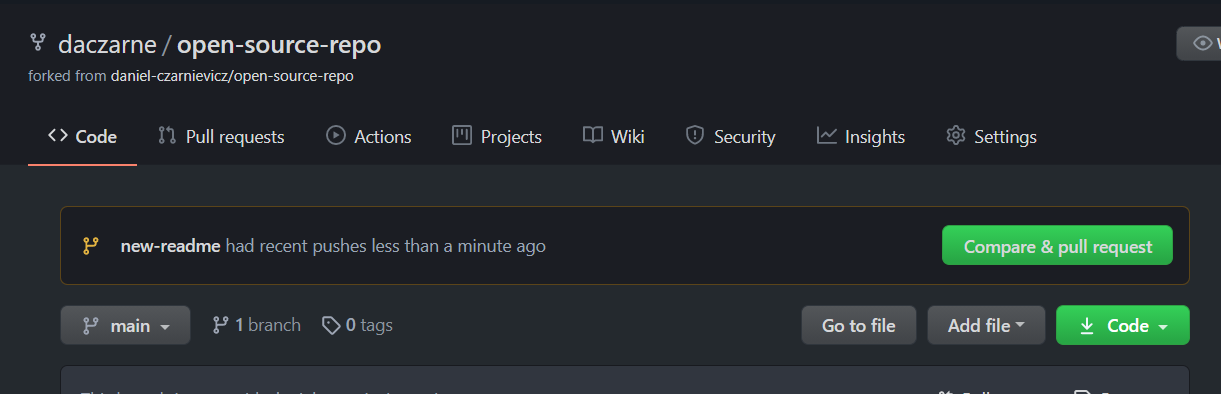
The new repository will have the same name as the original one (though we can change it), and a legend will be displayed below our repository's name saying from which repository it was forked. Since this new repository is ours, we can push changes to it.
The first thing you need to do is to clone this new repository to your local machine so that you can work on it. Then, create a new branch where you will work on your proposed changes.
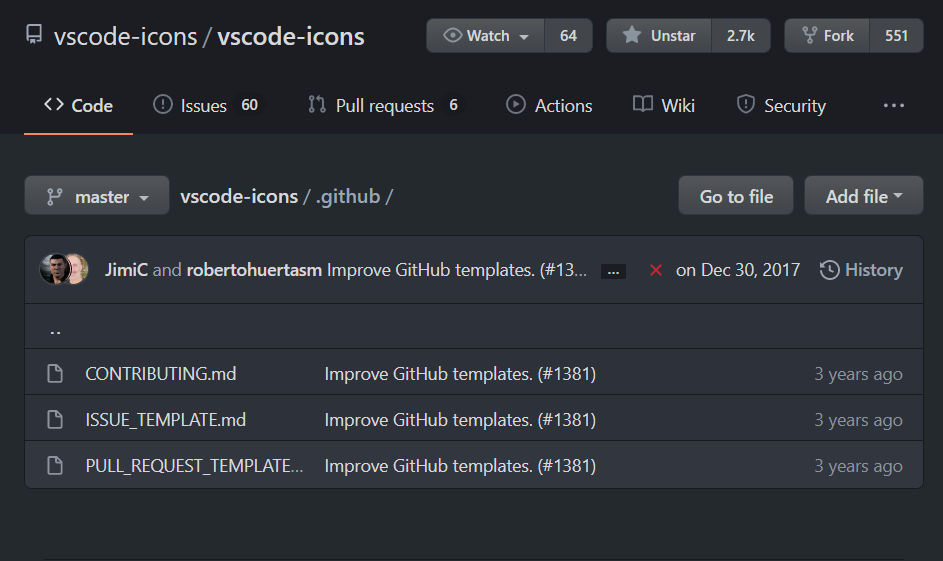
Most open-source projects welcome contributions as long as they are done following their contribution guide. Just as README.md and LICENSE.md are special files to GitHub, so too are files like CONTRIBUTION_GUIDE.md (or some variation of the name), CODE_OF_CONDUCT.md, and templates for issues and PRs. You can usually find all this information in either the root directory of a repository, a special folder set for this, or a Wiki page (under the Wiki tab of the repository).
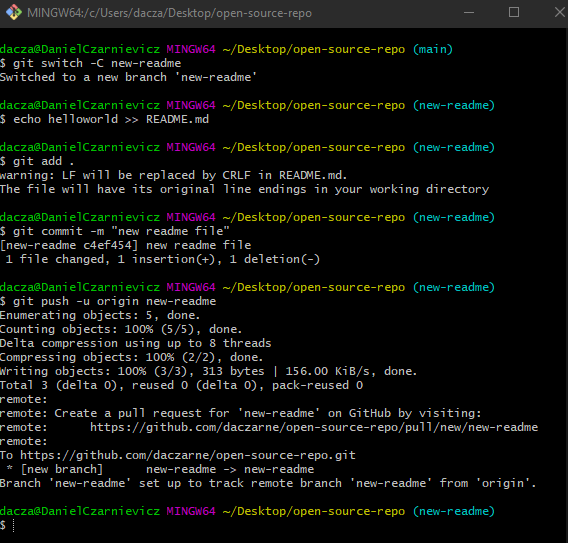
Once you've made all your changes, push them onto your forked repository. Remember that the first time you push a new branch, you need to set the upstream with
git push -u remote_name branch_name
Once you are done making and pushing all your changes, go back to GitHub and start a new PR.
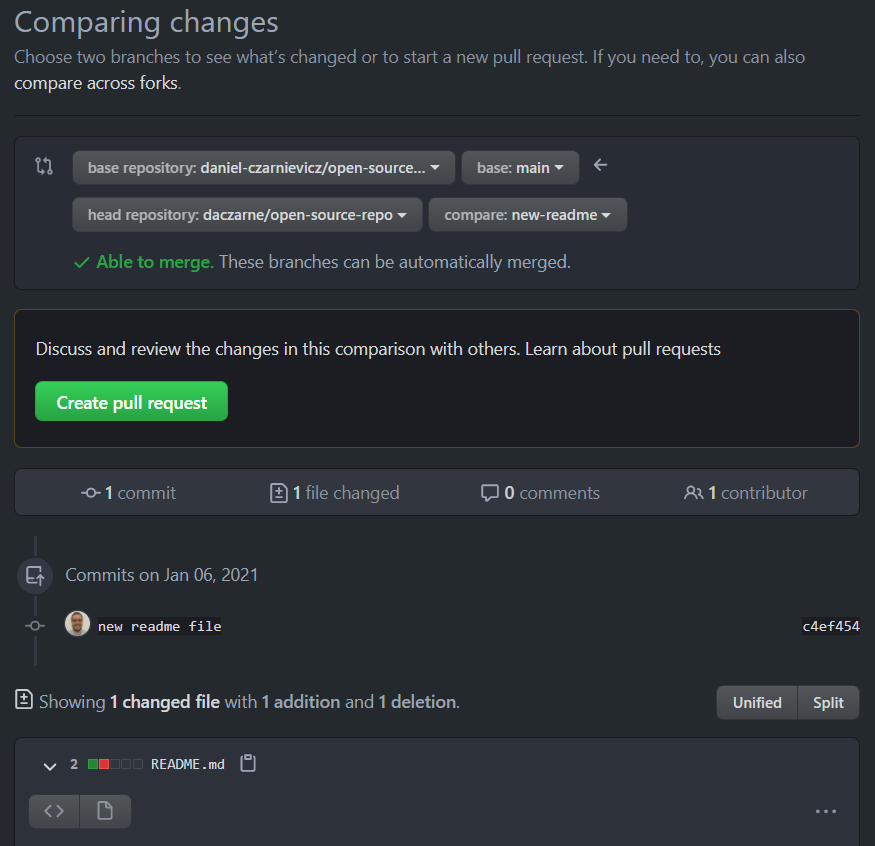
The only difference between this PR and the PRs we saw earlier, is that now you are going to be comparing the new branch on your repository, with a branch (in this case main) from the original repository.
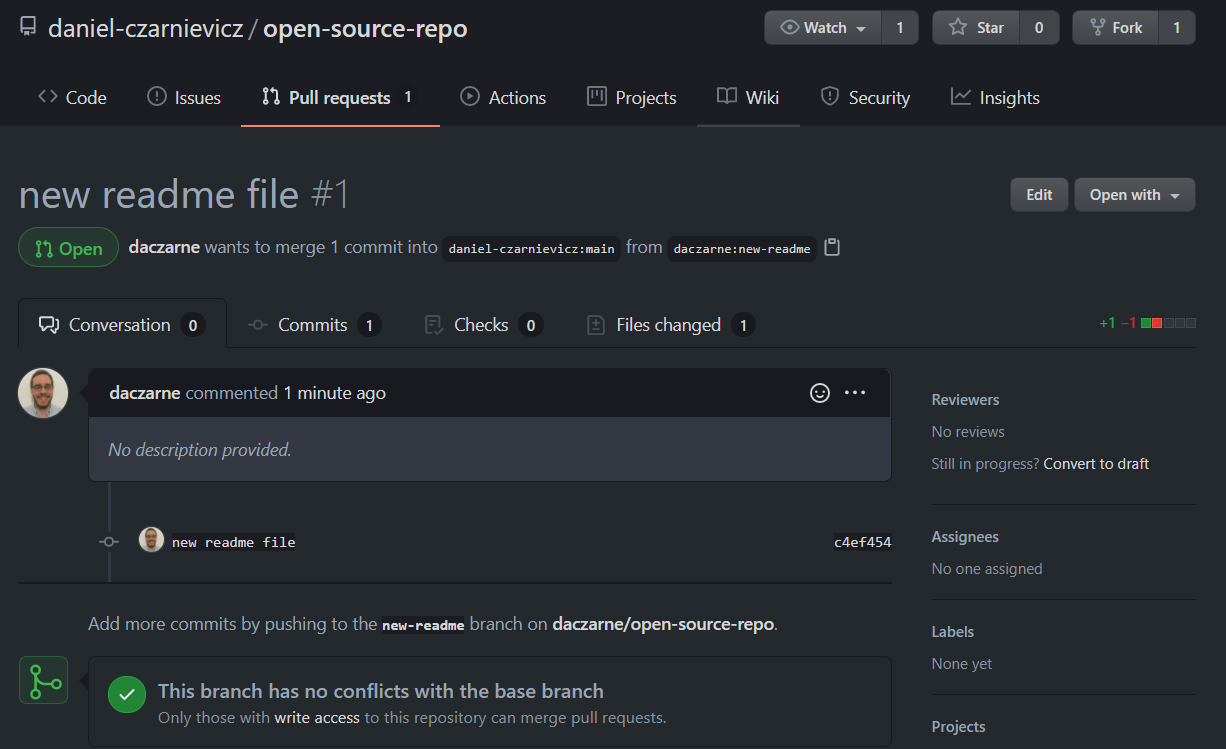
After clicking on the Create pull request button, GitHub will create it IN THE ORIGINAL REPOSITORY. There we can start a conversation with the maintainers of the project. They might request additional changes from us, or to expand our explanation or documentation of what our code does.
But notice that we are not allowed to merge the PR into the original repository. Only maintainers can do so.
Keep in mind that if we push more changes onto the branch that we've created while the PR is in progress, these changes will impact not only the branch in our fork but the PR too.
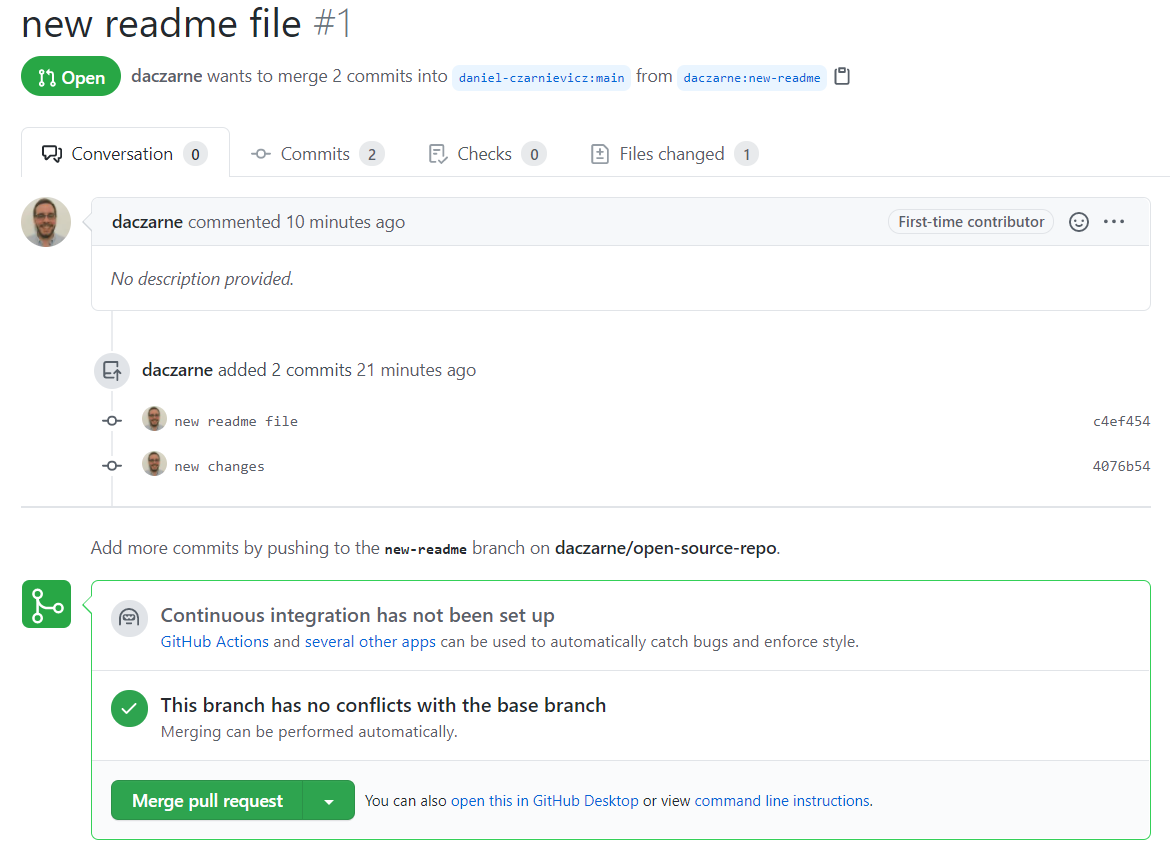
Whenever you find yourself in the position of the maintainer, merging this type of PR is no different than merging any other PR. Once that you and the contributor have finished discussing the changes and you are ready to merge them, just click on the Merge pull request button. If there are any conflicts you'll have to resolve them or ask the contributor to make a new push and that solves them, before clicking on the merge button.
Once the merger is done, the PR will be closed.
Now that your PR has been merged into the original repository, if you go back to your forked repository on GitHub, you'll notice a message saying that your fork is an x number of commits behind the base repository. This happens because even though our fork knows about the existence of the original repository, GitHub does not automatically keep them in sync. We need to do this manually.
Therefore, we need to be able to pull the new changes from the base repository onto our local repository of the forked repository. To do so, we need to set up a new reference between our local repository and the original remote upstream.
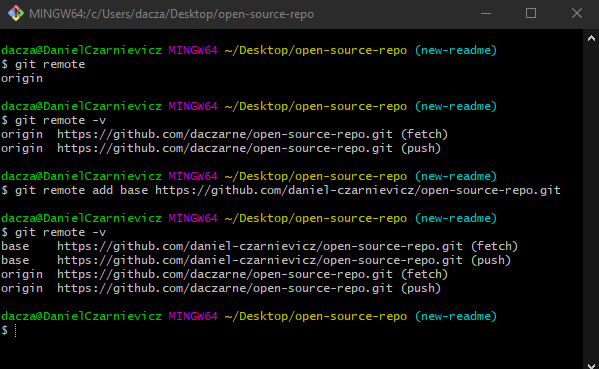
Let's start by checking our current remotes. To so, we run
git remote -v
Git will show us our current remotes and the URL from where they fetch or push to. When we clone a repository onto our machine, Git will automatically create the origin remote. In this case, this remote refers to our forked repository. To add a new one that points to the original upstream repository we run
git remote add remote_name remote_url
Here remote_name can be anything you want, but it's most common to call them either base or upstream. The remote_url we are referring to is the URL of the original repository.
If you want to change the name of a remote, just run
git remote rename current_name new_name
Similarly, to remove a remote, we run
git remote rm remote_name
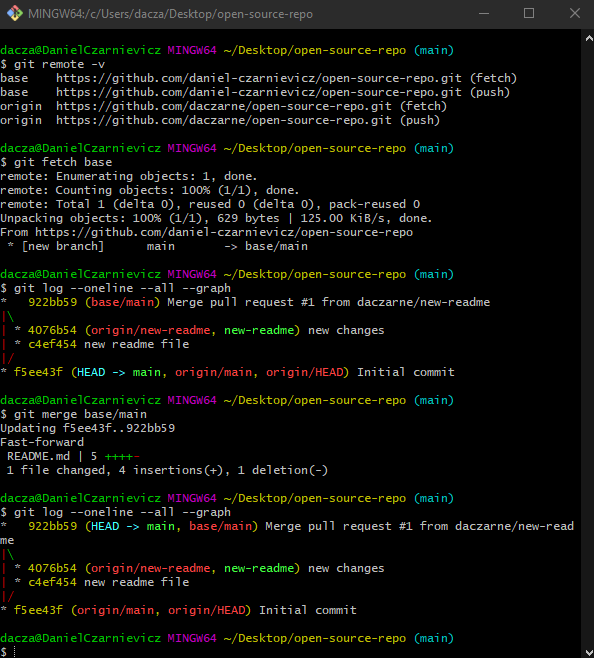
Now we can bring in the new changes in the original repository by using the fetch or pull commands. Remember that when we fetch or pull we need to supply the name of the remote from where Git is supposed to fetch or pull. When we omit this, Git assumes that we want to use the origin. But in this case, we must include it, since we want Git to bring in changes that are not in our origin but in a different remote. So, we run
git fetch remote_name
Notice that now we have a new branch called base/main. If we take a look at our log, we can see that this branch is ahead of our local main branch. So we need to merge base/main onto main. Luckily, there's nothing special about this merge.
Since our local repository is now in sync with the original repository, we can push these changes into our forked repository and it too will be up-to-date with the original one.
One thing you may have noticed is that we never merged the branch where we made our proposed changes onto the main branch of our repository. You can do so if you want. But our changes got brought into our local and remote main branches via the pull (or fetch) from the original repository in its post-PR state. So they are there already.
If you decide to go ahead and merge anyway, keep in mind that the maintainer of the original repository may have changed our code when merging (maybe he/she fixed some merge conflicts for example). By merging our branch onto main we may be reintroducing those merge conflicts. So it's usually best to just throw them away (unless our changes were rejected by the maintainer but we'd still like to keep them).
A final comment. When contributing to open source projects is usually customary that before we send a PR, we pull in the most recent changes from the original repository first, merge the main branch onto our proposed changes, and then start a PR. This decreases the number of merge conflicts that could happen when merging our PR into the original repository.