A Pull Request (from now on, PR) is a way of opening a discussion on a repository so that we can get feedback from other team members on our code. In many organizations, opening PRs to merge code into production or staging branches, and reviewing other's people code is mandatory, even for the most senior developers.
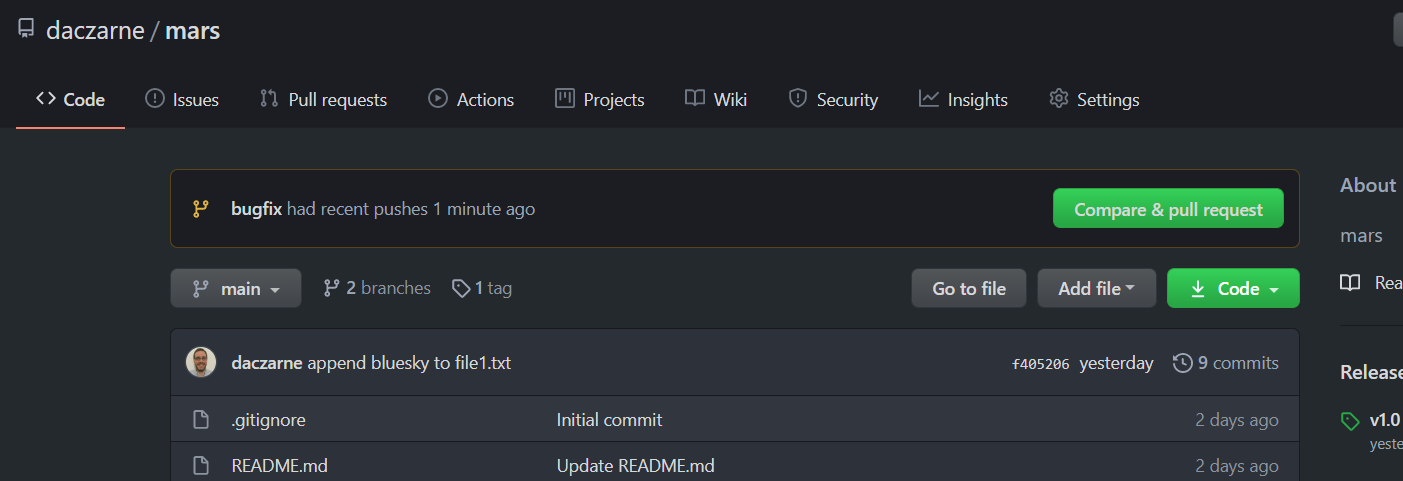
To see a scenario, let's suppose we just created a new commit on a branch called bugfix and we pushed it to the remote repository. If we now go to GitHub, we'll see the message to create a PR. To start creating a PR, click on it. Alternatively, you can go to the Pull Requests tab and start it from there.
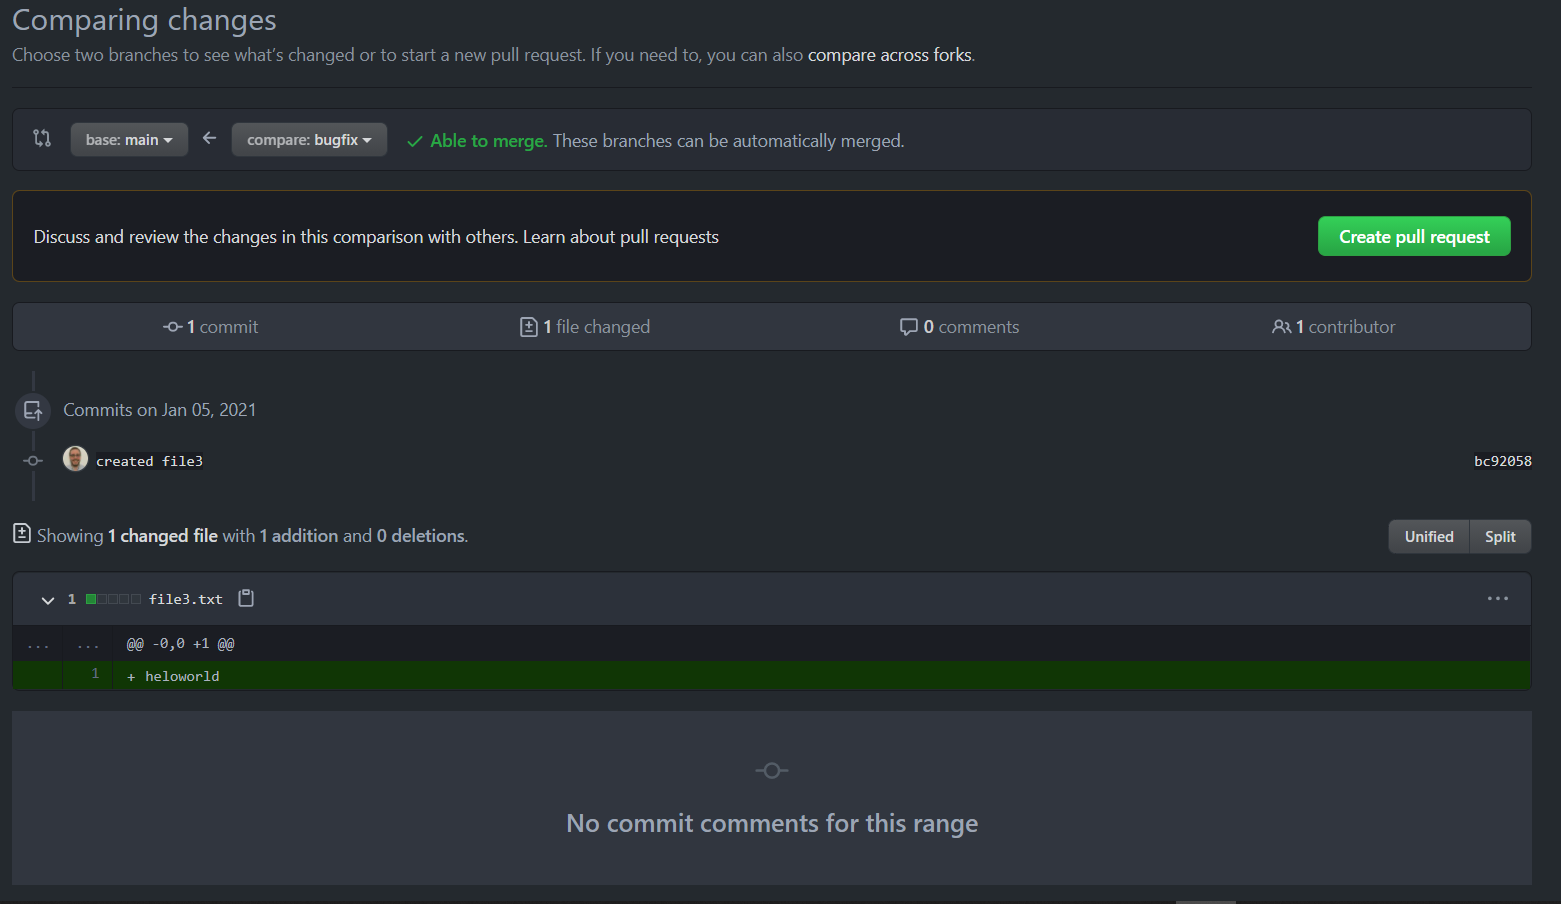
You'll see a screen like the one below. First, we need to select two branches. The base branch is the branch that we want to merge our code into (here we'll choose main), our compare branch is the branch that has the code we want to merge into the base branch (in this case, I called the branch bugfix). Next to the branch selectors, GitHub is telling us that this branch can be merged without generating conflicts. This is will not always be the case. If GitHub tells us that there are conflicts that will have to be resolved that's OK, first our code needs to be approved by our teammates anyway.
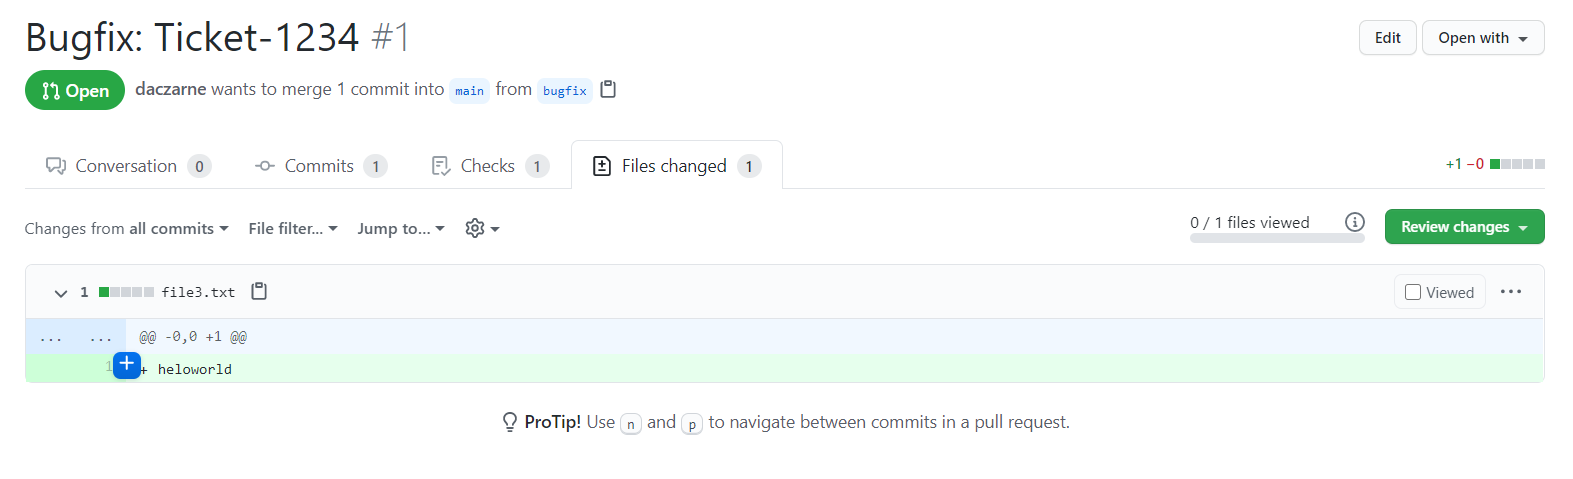
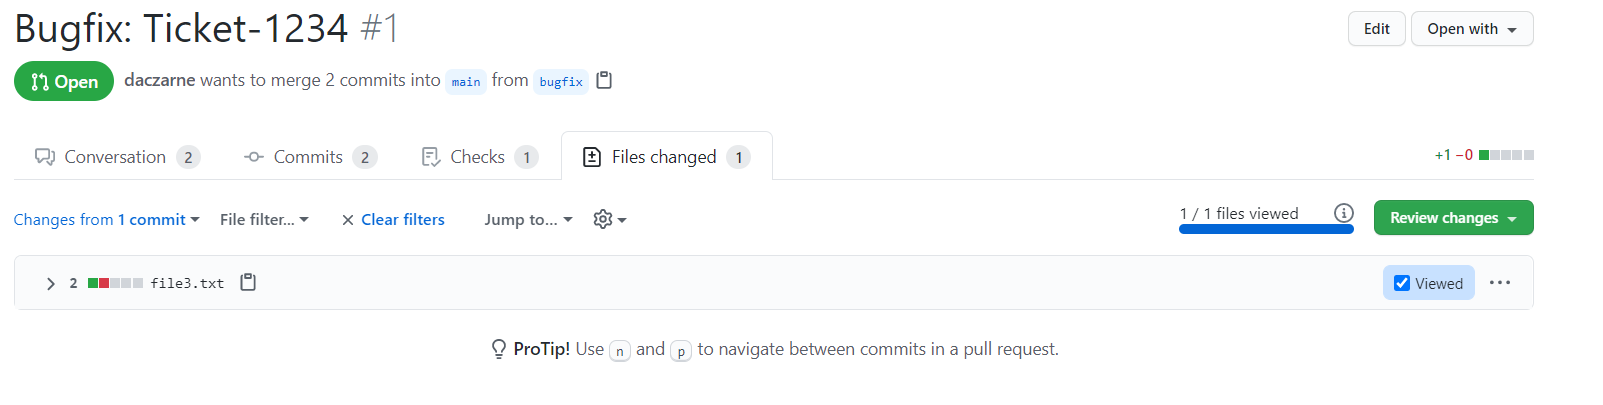
Below that we can see the summary of changes. GitHub is telling us that this PR will include 1 commit, with changes to 1 file. After that, it shows us a graph of the involved commits. At the bottom we can see the diffs for the different files (you can toggle the views by pressing the Unified and Split buttons on the right). When you are done reviewing this page, click on Create pull request.
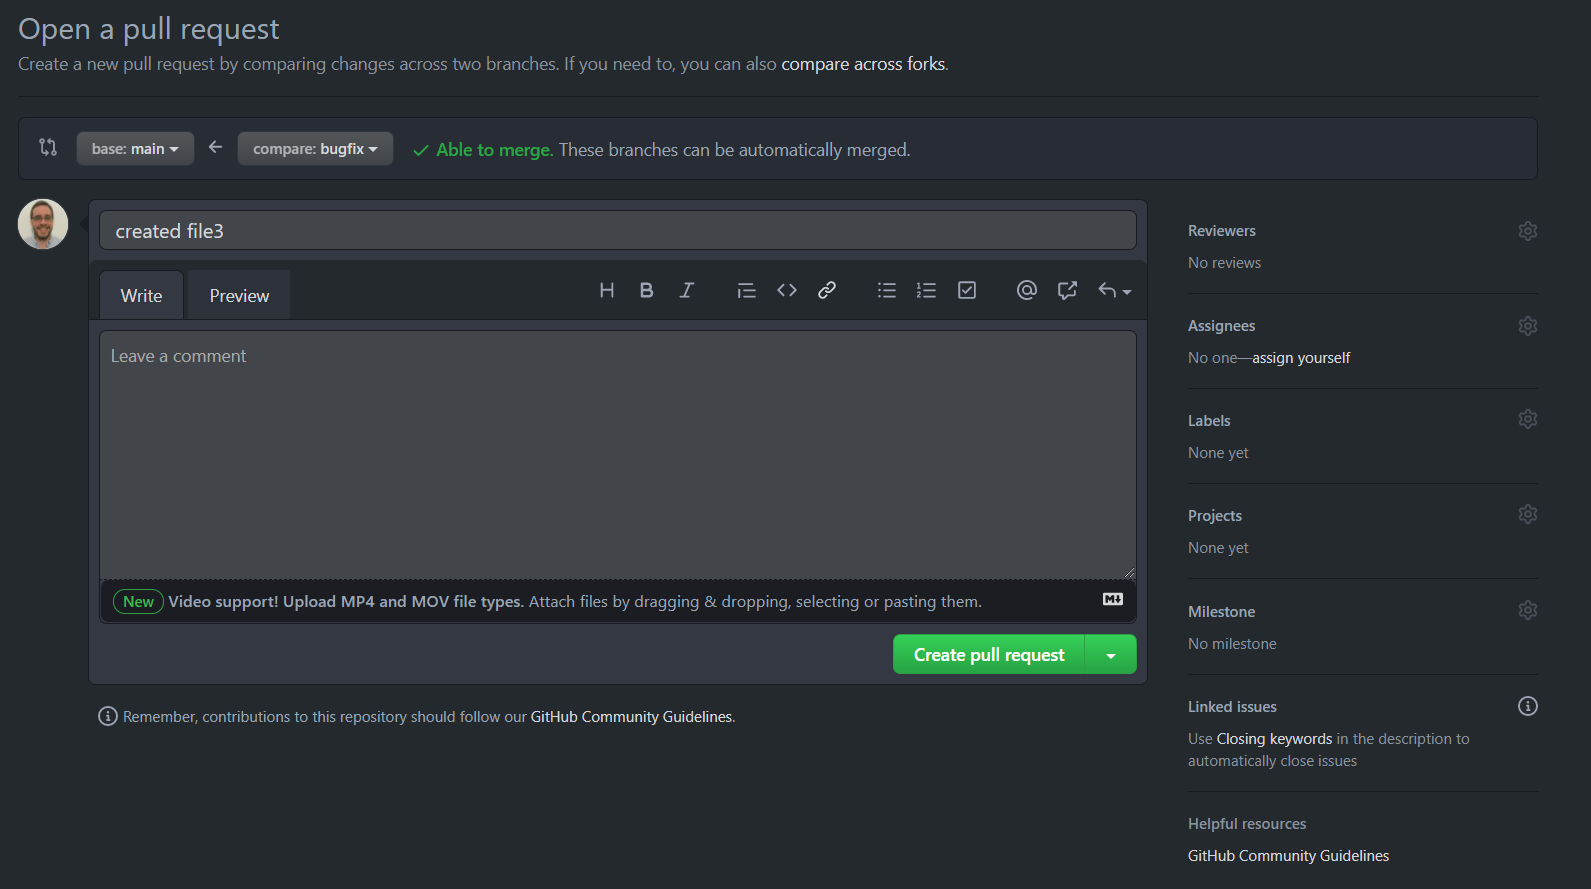
In this new screen we need to first enter the PR's title. Because this PR has only 1 commit, GitHub used the commit message as a PR title. Usually you should change it to something more meaningful, related to the task at hand (like feature name or bugfix and the ID of the bugfix task).
In the details section of the PR you can write whatever you want. Usually we list the changes or functions that were implemented plus a short description of what they do. If there's any part of your code that you want your teammates to pay special attention to, this is where you should include that. When ready, click on the Create pull request button.
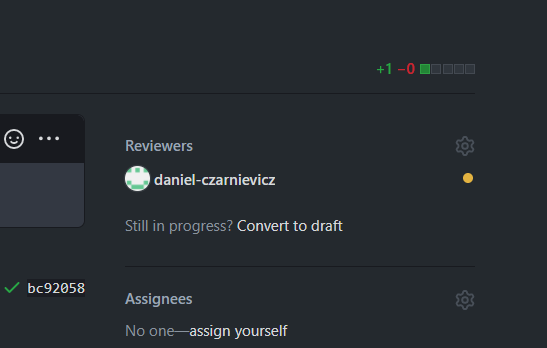
Now, if a reviewer was not assigned automatically, you need to assign one. You can assign more than one too. The yellow dot next to each reviewer's name indicates that they are still to respond to the review request.
From now on I'll be changing roles in this demo playing the role of the creator of the PR and the reviewer, but I'll always use the pronoun you since in the real world you'll have to do both: sometimes you'll be the creator of the PR (when you are sharing your code with your teammates and need someone to review it), and sometimes you'll be the reviewer (when another teammate is submitting code and asking that you review it). When playing the PR creator's role the screen will be in dark theme. When playing the role of the reviewer it will be in light theme.
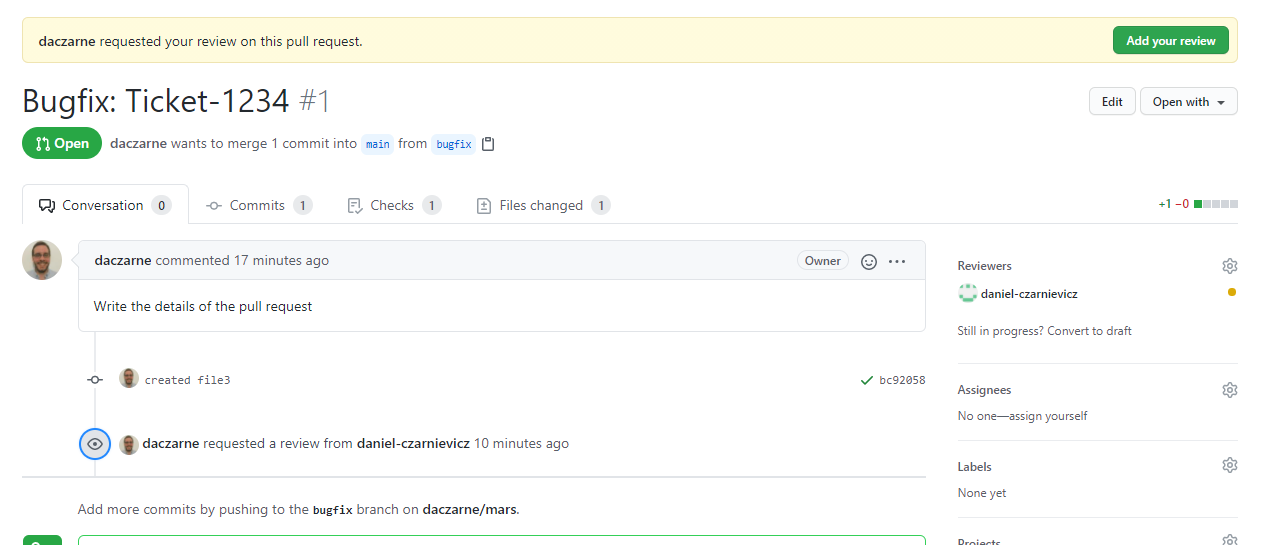
When someone asks for their code to be reviewed by you, GitHub will send you an email. Upon logging into GitHub you'll see a message that says that a teammate requested a review from you. Click on the Add your review button.
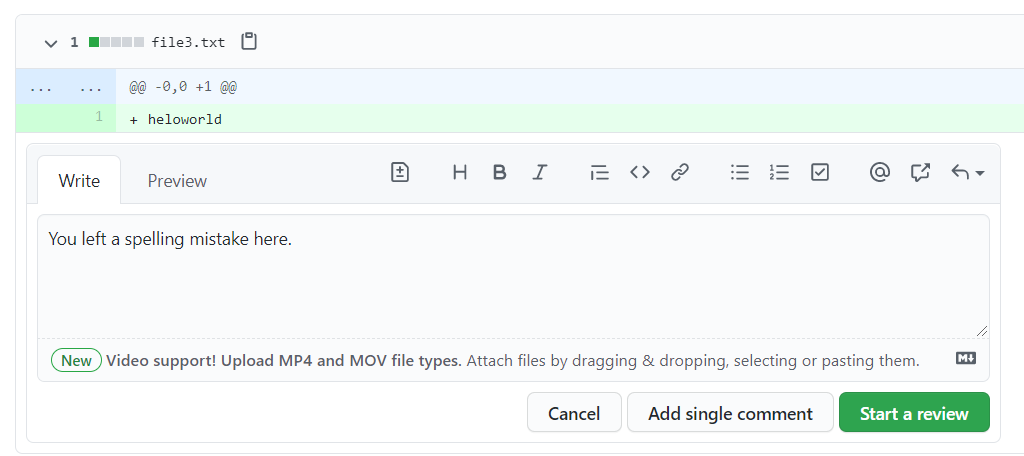
You can now add comments to every and any line of code you think needs one. When you hover over a line, a blue plus sign will appear. To add a comment click on it.
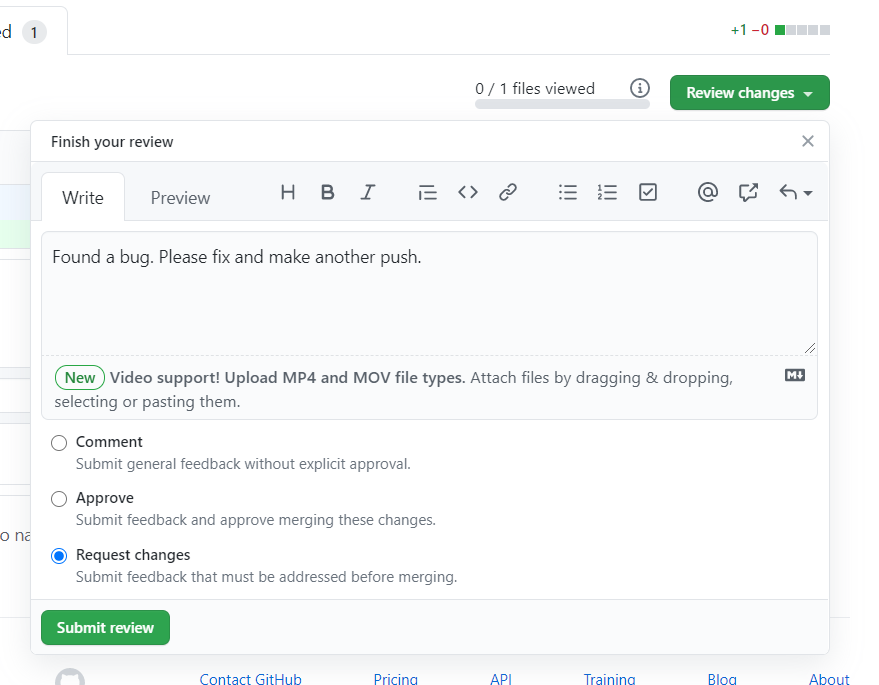
After adding all of your comments, click on the Review changes button in the top-right corner. Here you can add a general message and approve, comment, or request changes from the PR owner (the teammate who submitted it).
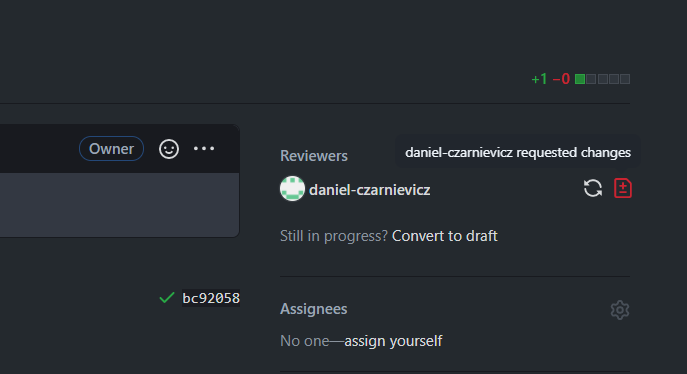
Let's go back to supposing that you are the person who created the PR now. When the reviewer submits the review, you'll get an email from GitHub saying that your code has been reviewed. Since in this case changes were requested, you'll see a red icon next to the reviewer’s name.
Next, you'll go back to the code, implement the requested changes (if you agree with them of course), and push the new commit onto the remote repository. Now you can request a new review by pressing the arrows next to the red icon.
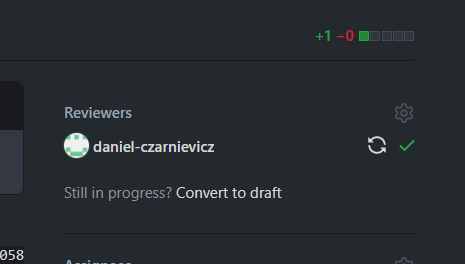
Back in the reviewer's role. You received an email from your teammate saying that there's a new version of the code. You review it again and since you are now OK with the code, you click on the Viewed button. Now you submit a new review, this time approving the changes.
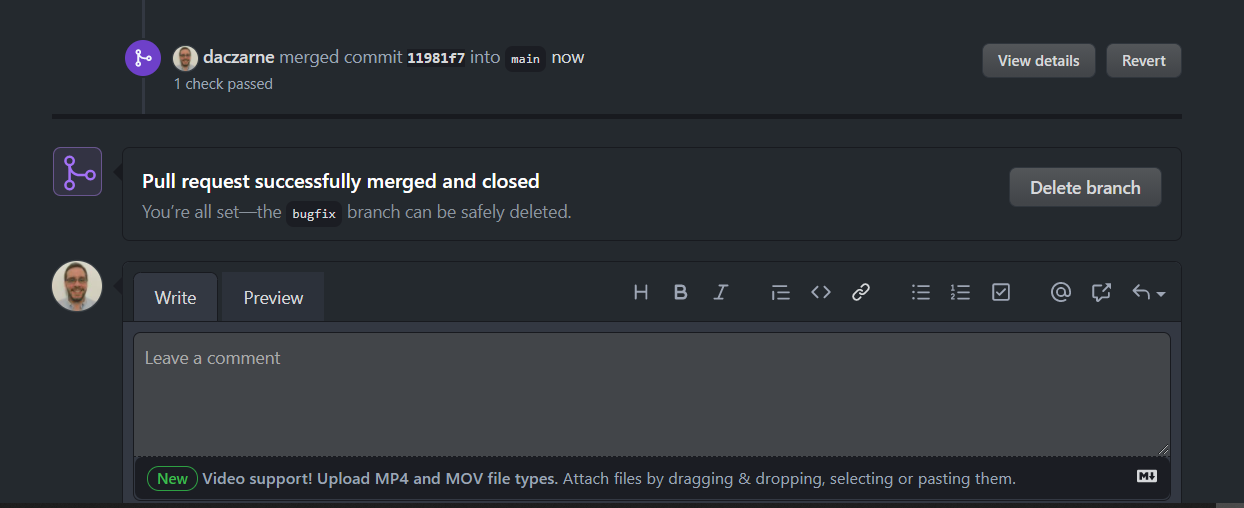
The person who submitted the PR will now see a green check mark next to the reviewer's name. So now it's time to merge the PR onto the base branch.
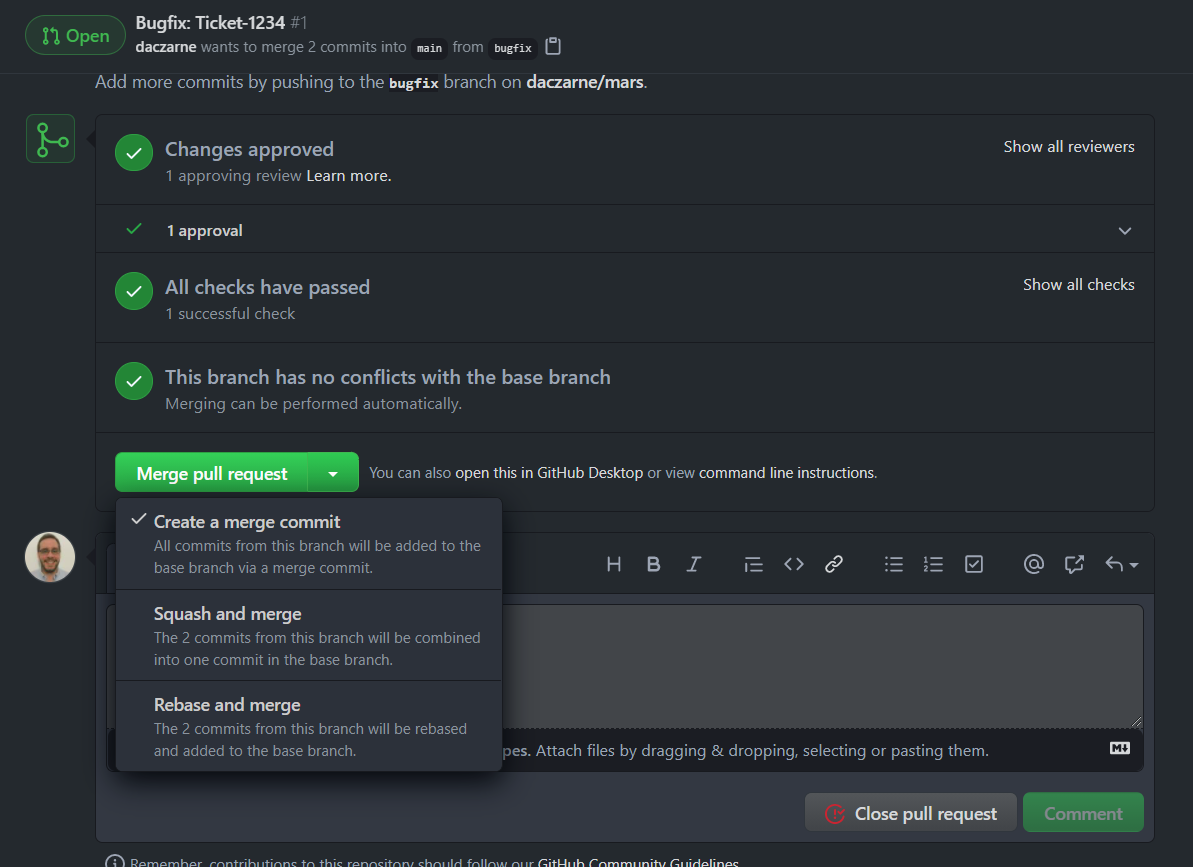
Back in the PR's discussion panel you'll see a Merge pull request at the bottom. Who should merge is something that depends on the type of project and the culture and rules of the organization. Some prefer that a person other than the one who opened the PR merges it, some prefer the person who created it to merge it. Just follow the rules and customs of your organization.
To merge, all you have to do is select the type of merge and click on the merge button.
Once done, don't forget to delete the branch. To delete the remote branch you can just click on delete branch. To delete the local branch on your computer, remember to first pull, switch to main, and then delete and prune.
If you delete a branch by mistake, don't worry. Once you click on the Delete branch button, it'll change to Restore branch.
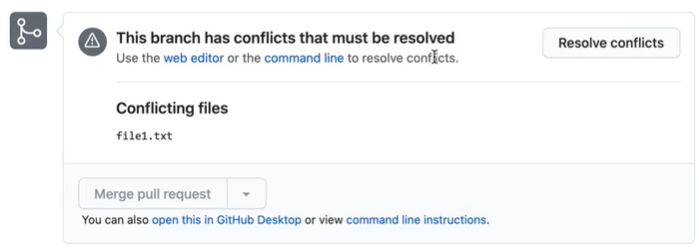
As a side note, if during the PR process conflicts with the base branch appear, you'll see this message on the PR panel. You can resolve the conflict the same way as we saw before using VS Code, or you can click on the Resolve conflicts button on GitHub. Either way you do it, the conflict is resolved the same way and the interface is pretty much the same.