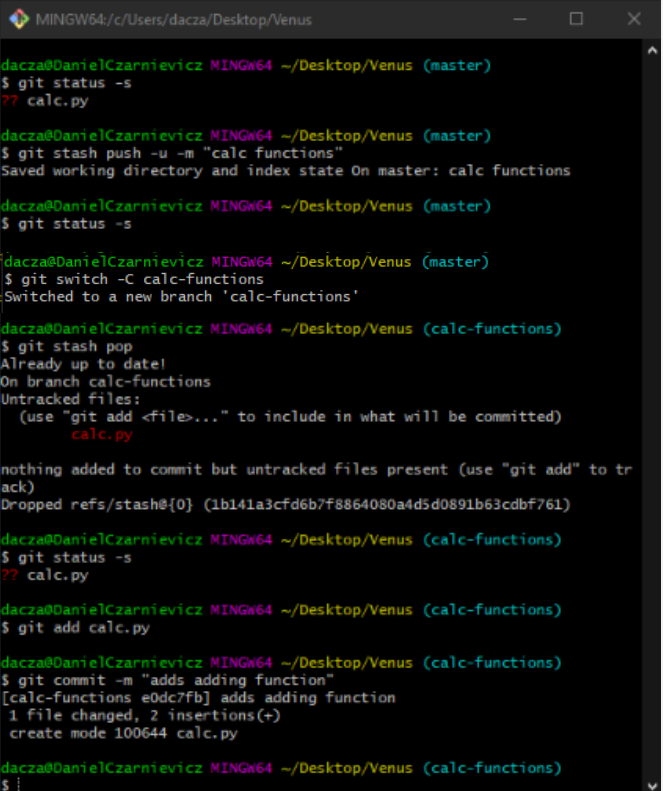
Suppose we are working on a new feature and we realize that we forgot to create a new branch before starting. We could throw away our work and create a new branch. But that would involve...well...throwing away our work. We can solve this situation by stashing our work.
As an example, suppose we created the new calc.py on master and now we want to move it into a new branch called calc-functions. First we need to stash our un-tracked file. To so we run
git stash push -u -m "calc functions"
We use the -u option here because our file was un-tracked. More on that below. Now that we've stash our changes, we can switch into a new branch with
git switch -C "calc-functions"
This will create a new branch called calc-functions and the -C option with tell Git to also switch into it. Now that we are in the new branch, we can unpack our stashed changes by running
git stash pop
We can now finish our work, stage it and commit it.
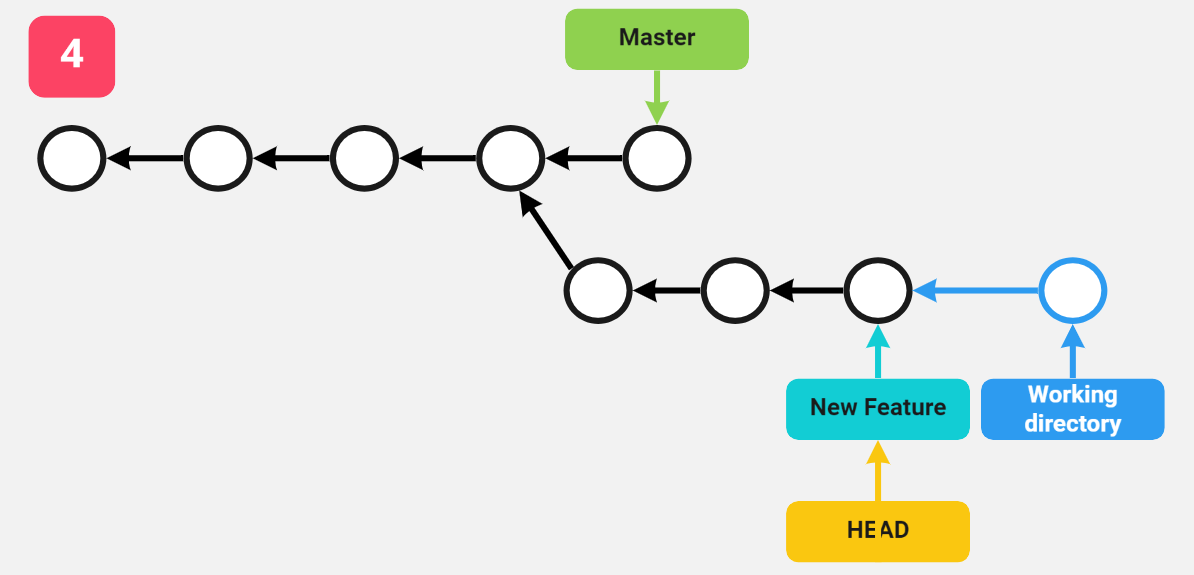
If you are left wondering how does this work, here's a simplified explanation.
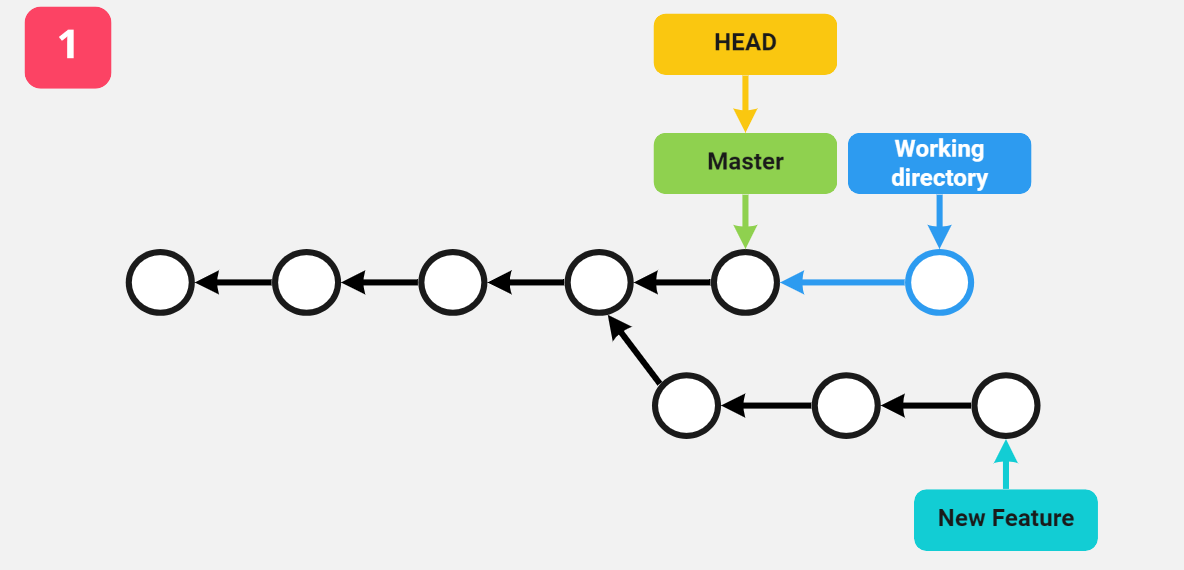
1
When we invoke git stash Git commits our changes and creates a new type of reference called a stash from where it can access that new commit (technically there are several commits involved depending on what we are stashing, you can read all about it here ).
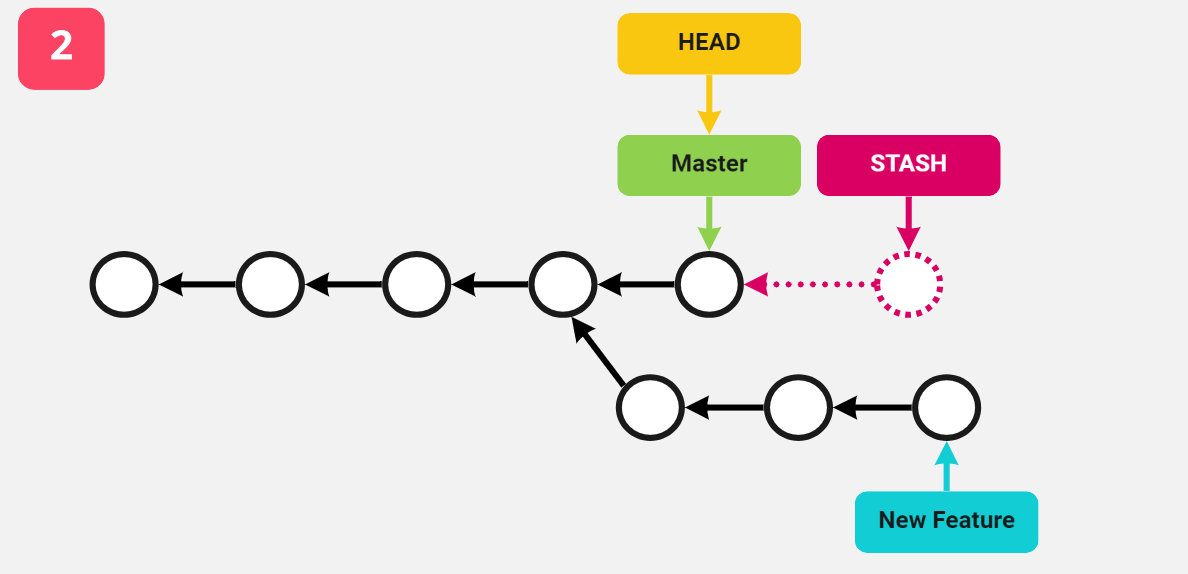
2
When we switch branches Git just moves the HEAD reference to the tip of that branch.
3
Finally, when we pop our stashed commit, Git adds the content of that commit to the working directory in that branch.
One thing to keep in mind here is the difference between git stash pop and git stash apply. They both add the content of the stash to the working directory of that branch, but while pop deletes the stash, apply does not.
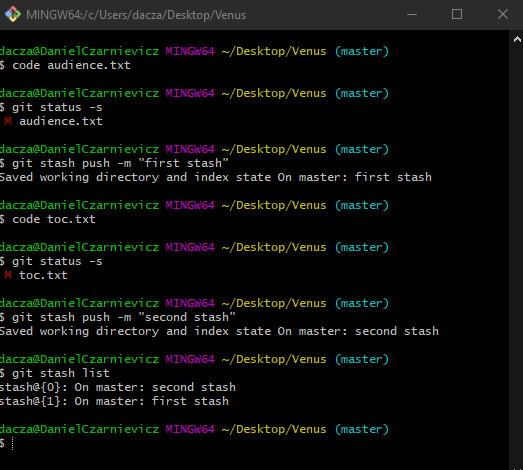
We can have more than one stash. To get the list of stashes we run
git stash list
Git keeps track of which stash was added first and which one was added last. The stash at the top of the list is the one that was added last. When we run git stash apply (or pop) this is the stash that will be applied by default. But each stash has a unique identifier called stash@{n} where n is its position on the stash stack. You can use these identifiers (or just the n number) to reference them when popping or applying.
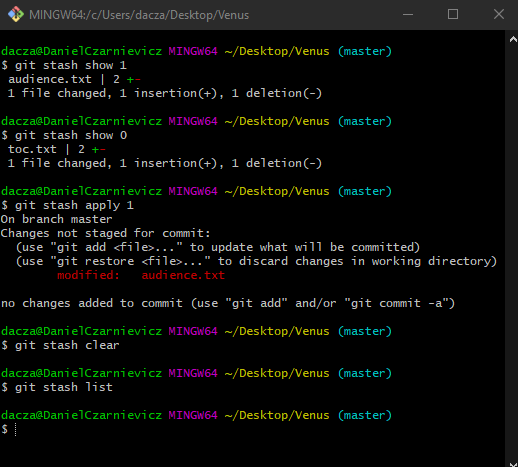
One place in which this references come in handy is when viewing the changes of a stash. When we have more than one stash we should check what's in a stash before applying in to the working directory. To do this we run
git stash show n
where n is the reference. With this Git will show us what changes are done in each stash so that we can choose which one we want to apply.
Once we select the stash to apply, we can do so with
git stash apply n
Once we are done with our stashes we should delete them. Here we can use
git stash drop n
to drop the n-th stash, or
git stash clear
to drop all stashes.