The git status -s only tells us which files have changed. To explore what we have in the staging area we use
git diff --staged
The first line of this output tells us that the diff utility was called to compare two versions of file1.txt. The copy prefixed with a is the old copy (the one we had in the last commit). The copy prefixed with b is the one we have in the staging area. Next, we have a legend with the IDs. After that, there's a line with --- a/file1.txt and another one with +++ b/file1.txt. Changes to the old copy are prefixed with minus signs and changes to the new copy are prefixed with plus signs. After that, there's a header with information about which parts of the files have changed. This is because Git will not show the entire file (if it's too long), just a chunk. Each chunk has a header that looks like that. The first part of the header says -1,3. This means Git is showing lines 1 through 3 of the old copy.
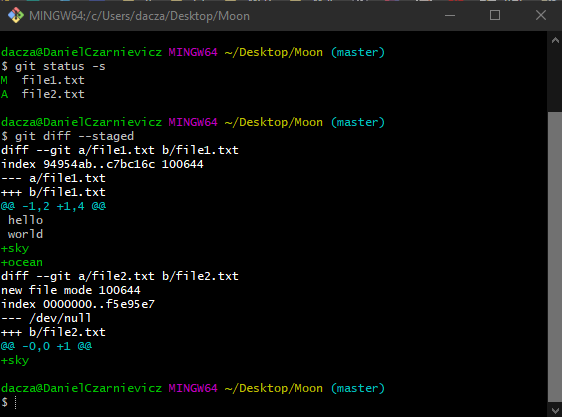
The second part of the header says +1,5. This means Git is showing us lines 1 through 5 of the new copy. Below that we can see the difference between the two of them. The +sky and +ocean mean that those two lines are new lines that are being added in the new version of the file.
Now we'll compare two versions of file2.txt. In this case, Git is showing --- /dev/null along with a header of -0,0 because the file is new. So, from the "previous" (none-existing) version is pulling lines 0 through 0.
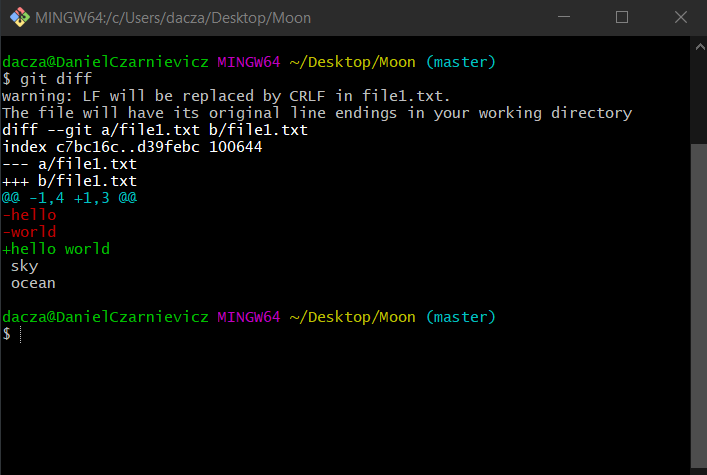
If instead, we wish to compare files in the working area to files in the staging area, we use the same command but without the --staged option. So,
git diff
Here Git is telling us that in file1.txt the first two lines (hello and world) were removed and replaced with a new line (hello world).
As you may have probably guessed already, this is not how we inspect changes. To inspect changes we use a diff tool. Here we'll use VS Code. So first we need to set VS Code as our default diff tool. To do that, we run
git config --global diff.tool vscode
With this command, we are just giving a name to our default diff tool. Now we need to tell Git how to launch our diff tool. To do this we run
                git config --global difftool.vscode.cmd "code --wait --diff
                $LOCAL $REMOTE"
For this to work remember that you must have added VS Code to your system path. If you forgot about that, the easiest way is to just reinstall VS Code and check the add to PATH checkbox on the installation wizard. code just tells the command prompt that it needs to open VS Code. The --wait option tells the command prompt that it needs to wait until we are done with VS Code. The --diff option tells VS Code that we want to use it for diffing files. Lastly, $LOCAL and $REMOTE are placeholders for the older and newer versions of the file.
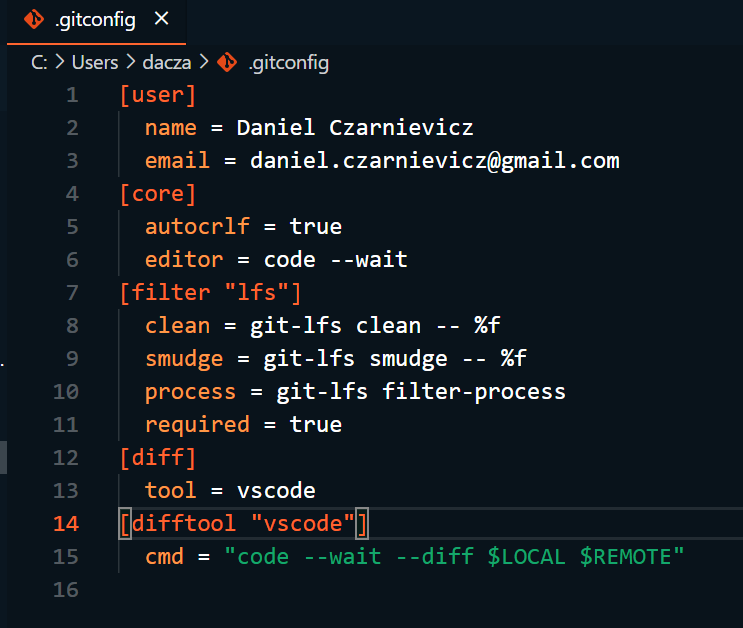
To check that everything went OK, just run
git config --global -e
This will open the Git settings in VS Code. You should see the commands we just run at the bottom of the file. Make sure that they are just as we typed them. So tool = vscode and cmd = "code --wait --diff $LOCAL $REMOTE". If there are any mistakes, you can correct them there. Just remember to save your changes before closing.
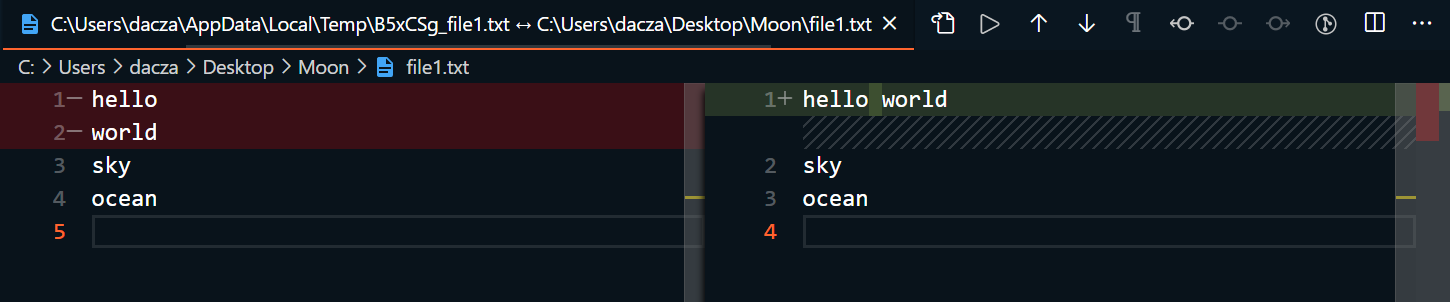
Now, all we need to do is to change the diff part of our command with difftool and select Y when prompted by Git Bash. This will open VS Code with both versions of our file placed side by side. The old copy that we have in the staging area is shown on the left-hand side panel, and the new copy that we have in the working directory is shown on the right-hand side panel.
Now we can take a look at the diffs in the staging area by running
git difftool --staged
In this case, the old copy (left) is what we had on the last commit, and the new copy (right) is what we have on the staging area. If more than one file is affected then, once we are done with the first one and close VS Code, Git Bash will ask us if we want to look at the other one.